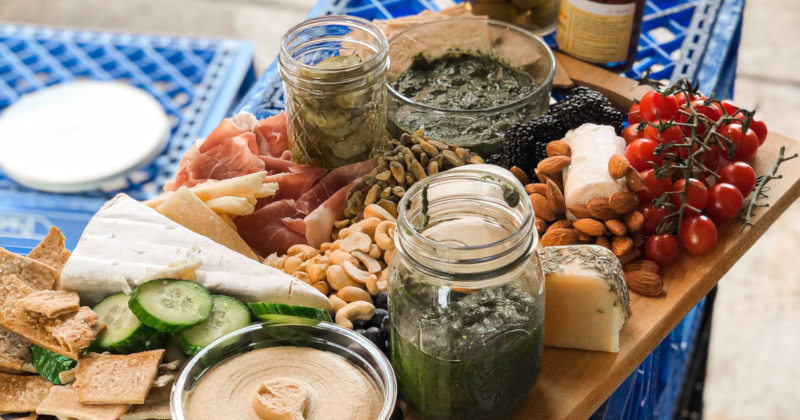
Whether there’s a special occasion or not, there is always an excuse to indulge in a beautiful charcuterie board paired with your favorite wine. There are plenty of places where you can order a box filled with all you could ever want in your charcuterie spread but why not make the experience much more fun and satisfying by DIY-ing your own board?
Making your own charcuterie board isn’t that complicated either. All you need are the following components: cheese, nuts, cured meats, fruits, crackers, and spreads. That’s basically it! There are no rules to make your charcuterie board (it’s yours to enjoy, after all) but if you want to go the extra mile, take note of these tips:
1. Find a good board
Wooden cutting boards or slate boards would do quite nicely! But really, any board, plate, or tray you can find at home is fine.
2. Choose your ingredients
For cured meat: we suggest salami, prosciutto, and ham. You’ll probably want to estimate at most five slices of meat per person when assembling.
For cheese: always think about the taste and texture and aim to have a variety of them instead of just one type. We suggest getting blue cheese (like gorgonzola), goat or feta cheese, brie or camembert cheese, Parmigiano Reggiano, gouda, gruyere, and sharp cheddar. You don’t have to get all of these; a rule of thumb is you keep the number of cheese and cured meats equal (so if you have three types of cured meats on your board, choose three kinds of cheese).
For crackers: go for crisp water crackers or saltine crackers, breadsticks, and–if you have the budget–slices of french baguette.
For fruits and nuts: get fruits in a variety of colors, such as grapes, oranges, strawberries, and blueberries. Add raw nuts like almonds, walnuts, and pistachios for that needed crunch in the spread.
For spreads: those that come in tiny jars are good! If you already have jams and jellies at home, you can scoop up a portion and place them in tiny sauce bowls. Honey is also a great option!
3. How to arrange them
Arrange the large pieces on your board first. If you’ve got dips placed inside bowls, set them down first and then lay down the big cheeses and meat. Afterward, fill the empty spaces with the fruits, nuts, and crackers. Make sure they’re all bunched up tight instead of spacing them out too much so that your board actually looks full. Try to separate elements that have similar colors too. Again, there’s no right way of doing this, so just let your creativity run wild!
4. Other top tips
Make sure your cheeses are at room temperature upon serving. Cut them up into cubes too or, in the case of the crumbly or round cheeses, serve them with a cheese knife.
Add some decorative elements if you like, such as sprigs of rosemary.
Don’t forget to add the serving utensils!
Enjoy your charcuterie board with your wine of choice and have a great and relaxing evening.
(ALSO READ: Unwind and Celebrate Simple Moments at Home with this Delicious Grazing Box from Grazefully Yours)
Have you had experience making your own charcuterie board at home? Let us know your tips and tricks in the comments!
Do you have a story for the WhenInManila.com Team? Email us at story.wheninmanila@gmail.com or send us a direct message at WhenInManila.com Facebook Page. Interact with the team and join the WhenInManila.com Community at WIM Squad! Get the latest news about the Philippine Entertainment industry and join the WIM Showbiz Facebook group! We also share our stories on Viber, join us!


