It is hard for newcomers or beginners to master the art of videography. There is no hard and fast rule, especially regarding video stabilization. This requires familiarity with the number of parameters, tools, functions, and features to smooth out the process.
The impact of the shaky, wobbly, or vibrating footage is worse, and you cannot deny its importance. Therefore, the solution of video stabilization is a paradigm in this regard. A tool such as the YouTube video editor aligns with the algorithm behind the video stabilizer.
So, if you are behind in achieving captivating videos, this step-by-step guide will serve you best. Learn how to stabilize your video without making the extra effort and putting in sufficient time. Sounds incredible? Keep uncovering the facts!
Video Stabiliser – Defining The Term
Video stabilizer is a term that refers to an application or tool that assists you in getting rid of excess vibration, wobbliness, movement, and shakiness from your videos. The thing that makes this tool do the same is the AI technology behind it. Video stabilizer exists online. This does not limit the accessibility of the tool by its users or viewers. This takes up everything manually associated with vistabilizationtion.
Video Stabiliser – Sequential Steps Involved In Functioning
Multiple steps exist when it comes to the functioning of the video stabilizer. Some of the key steps that you need to consider are:
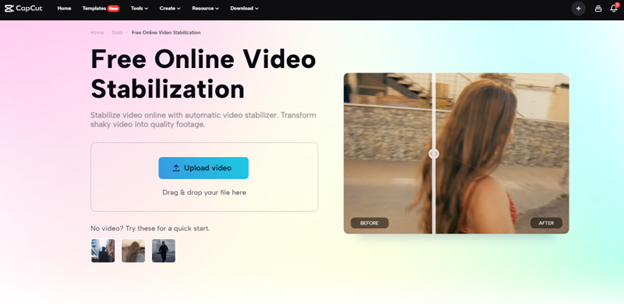
- The procedure starts with the accessibility of the CapCut main website. On the site’s main landing page, there lies a menu at the top. This menu features multiple options. One of the options which you need to choose is the “tool tab”. Selecting this tab opens up a menu with multiple categories and associated tools. From these categories, as you need to do the video stabilization, go to the video category and click on it. Clicking on the video stabilization will take you to the tool’s main page.

- While on the main page, the second step involves the video upload. To cope with the video upload, there are two different ways to do so. One is by clicking the video upload tab. Clicking on the video upload tab will open a window to help you navigate the saved path for video file selection. The other way to do the same is by drag and drop option. This option allows you to click on the video file from anywhere you want (from Google Drive, cloud storage, etc.) and drag it to the tools tab. Doing so will automatically upload the specific video. If you do not have any video, you can upload the template video on the main tools page.

- After finishing the upload part. The video stabilizer does not require you to follow any other extra steps. This way, the video stabilizer will do everything automatically. It automatically tweaks the jittery effects and moves objects within a single click. There is nothing more you need to face or follow. After the tool has finished processing, you can revert the changes and see the results of the stabilized and unstabilized form. If you are not satisfied, you also have an option to tweak the results later.

- In the last section, you need to download using the export tab. This tab is in the top right corner over the video stabilizer tab. Click on this option. Doing so will reveal the options such as download, TikTok upload, TikTok ad, and magic tool. The role of the magic tool is to assist you in tweaking the final results. Using it, you can remove the blurriness or speed up your video on the go.

What Positive Outcomes Can You Expect From The Video Stabiliser?
There are several positive outcomes you can experience using the video stabilizer. Some of the key positive outcomes include:

No Hardware Upgrade Needed
Unlike professional video editing software such as Adobe Premier Pro, which requires a special hardware upgrade. You need nothing like this when you are using the video stabilizer. This tool allows you to experience complete peace of mind. Apart from this, it prevents you from spending on hardware upgrades.
Feature Loaded AI
You can use and tweak the videos of any camera at hand. The multiple camera devices include mobile phones, drones, handheld cameras, and other similar devices. The video stabilizer allows you to capture and stabilize the videos of any camera you want, thus providing you with flexibility.
Auto Crop
The AI technology detects objects or things with higher movement or jitteriness levels. Later, AI technology employed the optimum cropping function, eliminating objects contributing to motion sickness. This way, you can harness the attention of the viewers.
Which Applications Makes The Video Stabiliser A Perfect Fit?
Multiple applications in the market contribute to the perfect fitness of the video stabilizer for them. The key highlights include:
Training Videos
The training video quality impacts the training of the clients, employers, or students. The video stabilizer lets you give your videos a smooth and professional look. It also allows you to convey the message with higher effectiveness and efficiency.
Social Media Usage
This tool is remarkably valuable for those who frequently shoot and post videos on social media. This tool allows you to make your videos smoother and give them a cinematic look.
Strengthen Your Marketing
The video stabilizer strengthens the market presence of your videos. It increases the attention and appeal of your videos. This, in turn, plays a key role in converting viewers into customers.


