Getting access to photography and editing tools have never been easier nowadays – and that’s why everybody is getting into the craft. With just the use of a camera phone and a free post-processing tool, some people are able to create jaw-dropping photos.
This sudden spike in the interest in photography has led to a number of trends and one of which is the neon edit.
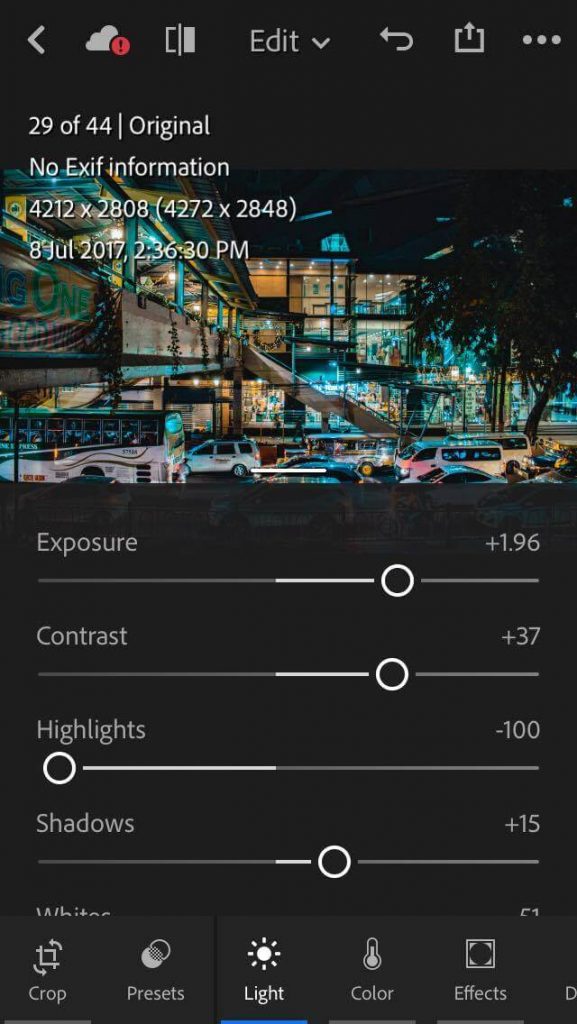
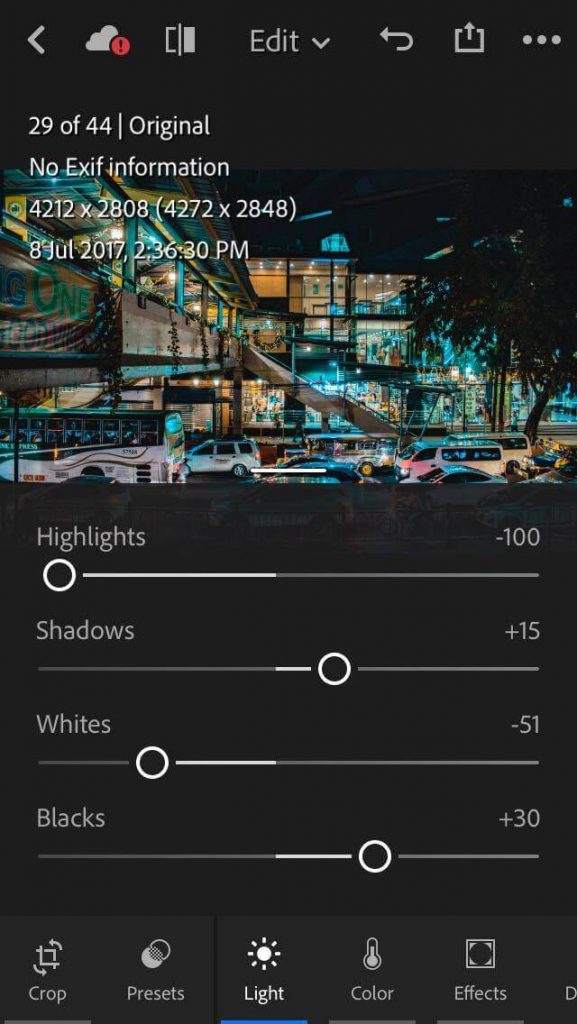
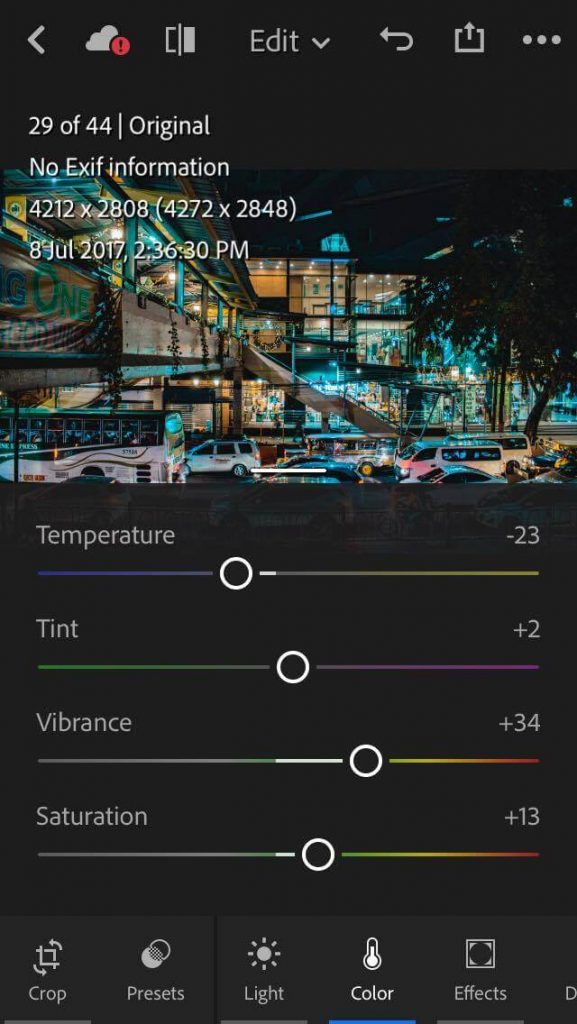
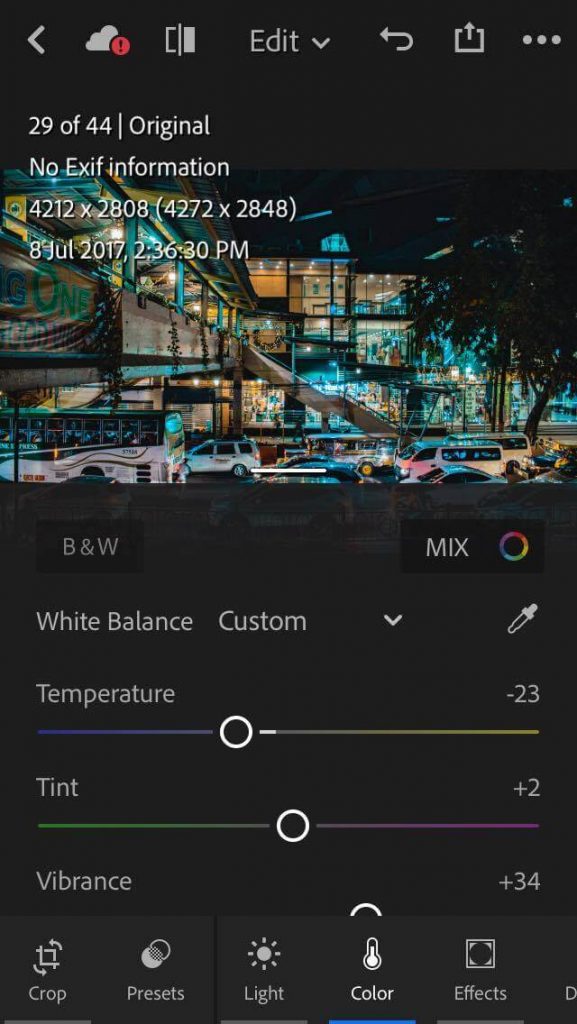
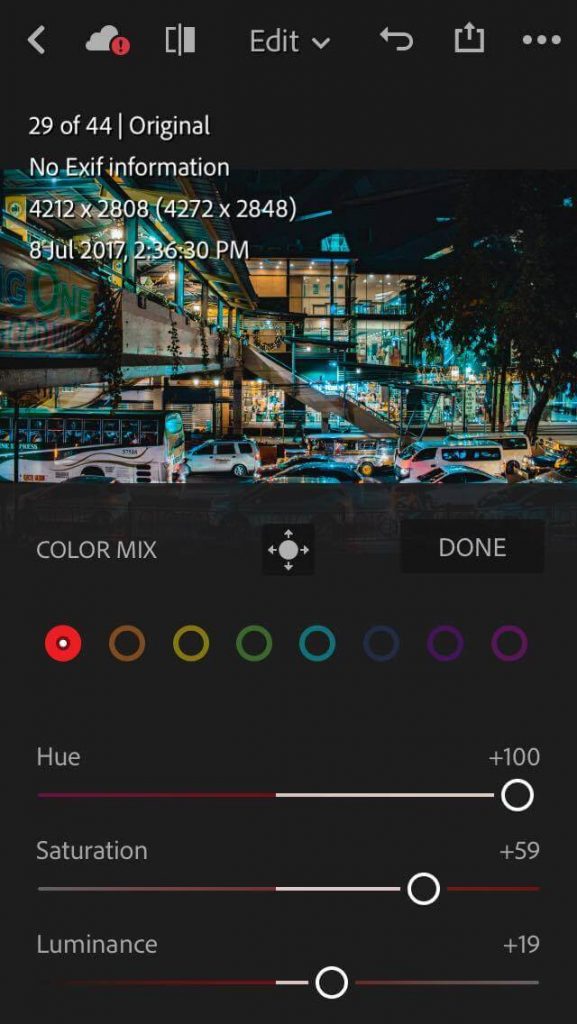
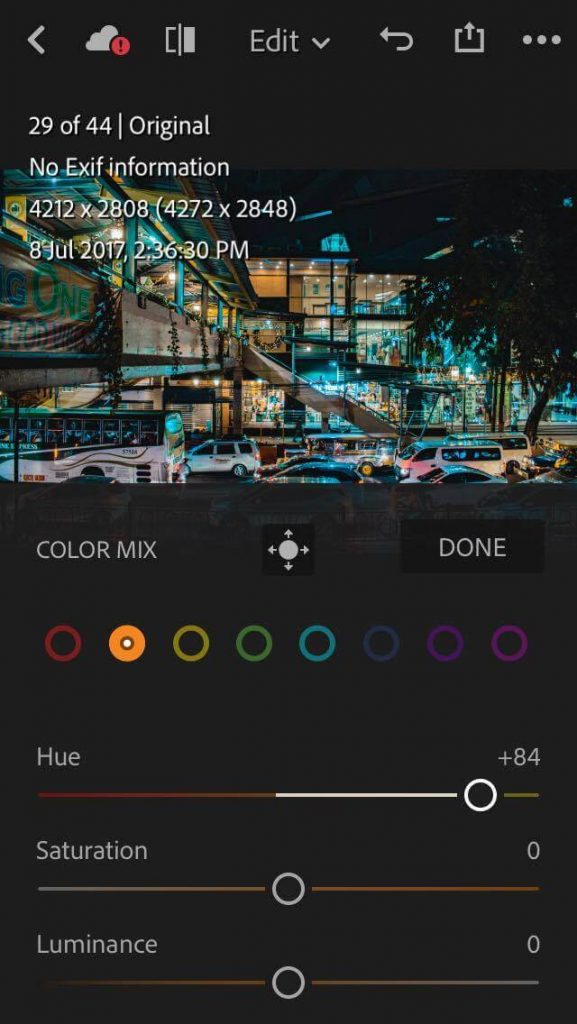
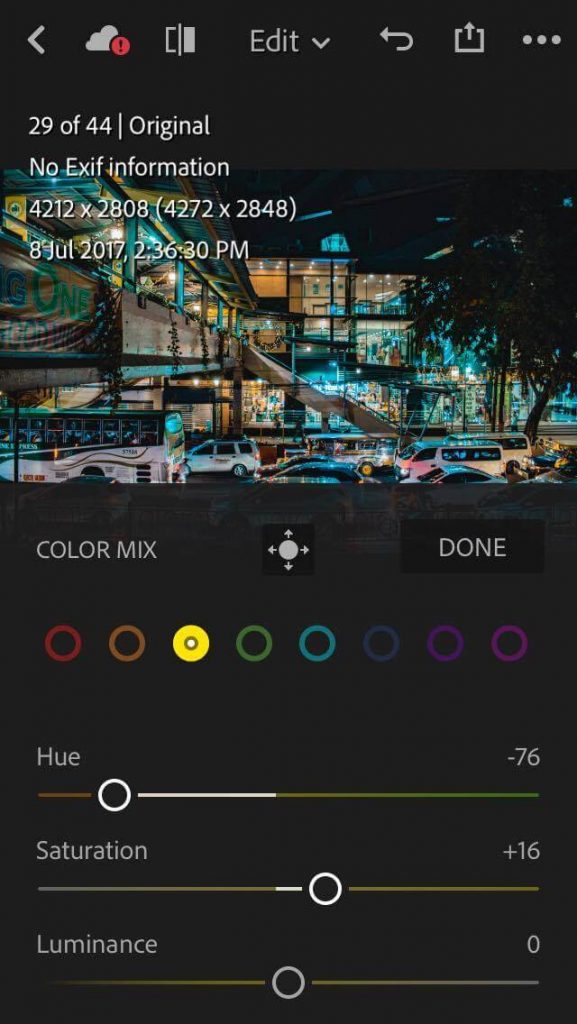
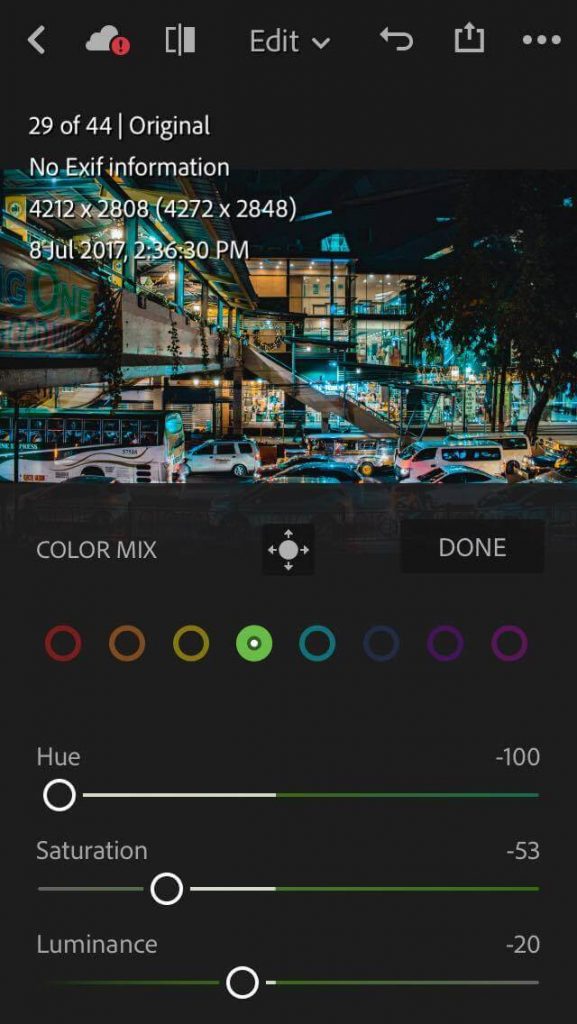
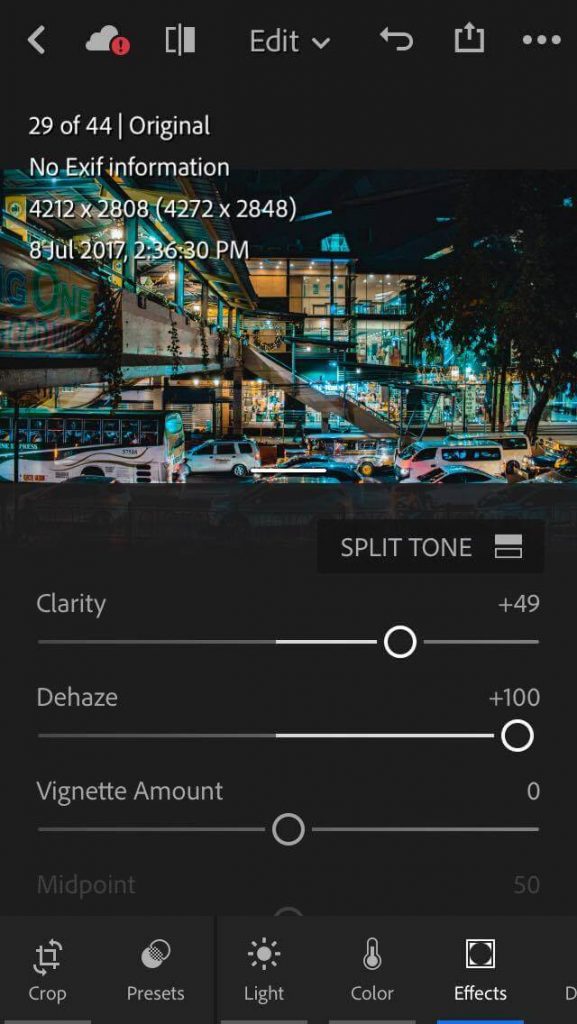
Want to join the fun? Our very own WIMtern, Eunick Nobe, created a step-by-step guide that will help you achieve the neon edit on your shots using the mobile version of Lightroom.
1. Fix the lighting
2. Adjust the temperature or color
3. Select “Mix” and play around with the colors
4. Adjust the clarity
Ta-da! You’re done! Here are the before and after photos.
Before
After
Eunick started taking photos when she was in college. She shared that through time and with constant practice, her shots became even better.
Her love for the city and the urban life is the reason why cityscapes, streets and skylines are mostly the subject of her photography.
She also does a bit of portrait photography every now and then.
Here are some of her photos.
You may check out more of her art on Facebook and Instagram.
Got questions? Ask us in the comments!

